To measure a margarita consistently, use one unit system, choose a tool with markings for the amounts you need, and repeat the same filling and pouring method. Measure the juice and sweetener as carefully as the tequila. Then write down any adjustment so the next drink starts from a known recipe.
You do not need a laboratory on the kitchen counter. A clearly marked jigger or small liquid measure, a little care, and a short recipe note make a useful starting kit.
Start with the units
Milliliters and fluid ounces measure volume. Grams and weight ounces measure mass. A scale reading of 30 g does not automatically replace 30 mL of tequila, lime juice, or syrup. Converting between mass and volume requires the density of that particular ingredient.
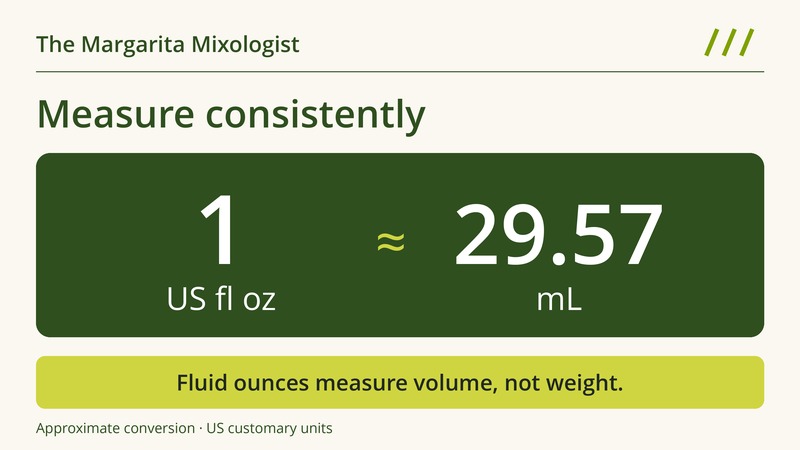
Check which fluid ounce the recipe means. One US fluid ounce is approximately 29.57 mL; one imperial fluid ounce is approximately 28.41 mL. The NIST conversion tables distinguish both from weight ounces.
| US fl oz | Approximate mL |
|---|---|
| 1/4 | 7.4 |
| 1/2 | 14.8 |
| 3/4 | 22.2 |
| 1 | 29.6 |
| 1 1/2 | 44.4 |
| 2 | 59.1 |
These are reference conversions, not a claim that an ordinary jigger can measure tenths of a milliliter. When a recipe gives rounded amounts in both systems, choose its stated primary units and follow that column throughout. If you deliberately adapt a recipe to convenient metric marks, record the new amounts. Calling 30 mL exactly one US fluid ounce hides a small change.
Choose a tool that fits the amount
A marked jigger is a practical choice for individual cocktails. Read its actual capacities and internal lines rather than assuming every double jigger measures the same amounts. For example, the UK OXO Steel Double Jigger lists 50, 20, and 10 mL on one side, and 30, 15, and 5 mL on the other. That is a specification example, not a hands-on product review.
A small liquid measuring cup can make several amounts easier to see. Look for clear markings near the quantities your recipes use. A large kitchen jug with widely spaced lines is awkward for a small syrup addition.
Measuring spoons are useful when their marked units match the recipe. Read the capacity on the spoon; an ordinary table spoon is not a measuring tool. Do not use a spoonful as a substitute for a specified number of drops or dashes.
A digital scale is useful for recipes written in grams and for making syrup by weight. Check that its resolution suits the smallest quantity you need. Tare the empty vessel, then weigh the ingredient. Keep grams in the record instead of relabeling them as milliliters.
A repeatable measuring routine
- Read the complete recipe first. Choose the unit system and check that your tool has the required marks. For 45 mL, separate 30 mL and 15 mL measures are an option when those marks are available. Do not estimate half the height of a tapered jigger and call it half the volume.
- Prepare the ingredients. Remove lime seeds and handle pulp the same way each time. Stir a separated syrup back together before measuring it. Use clean tools and a dry starting vessel so an unmeasured puddle of rinse water does not become an ingredient.
- Keep the measure level. Pour slowly as you approach the required line. For a conventional transparent side-marked measure, set it on a level surface and read at eye level. Where a clear liquid forms a concave meniscus, the little dip at its surface, read the bottom of that curve. NIST’s meniscus guidance explains why viewing position matters.
- Follow the tool’s reading method. Some measures are designed differently: OXO’s mini angled measuring jug is read from above. With a metal jigger, use its specified fill line or capacity and keep your filling method consistent. Avoid an extra dome of liquid above a brim measure.
- Transfer each measured ingredient. Pour it into the mixing vessel before measuring the next. Let thick syrup drain consistently. If syrup remains in the measure, rinse it through with part of another liquid already allocated by the recipe, rather than adding an unmeasured splash of water. If you overfill before mixing, remeasure that ingredient instead of guessing at a correction.
- Add ice and complete the recipe. Measuring into an empty shaker lets you finish the liquid amounts before shaking begins. Then follow the recipe’s ice and preparation instructions. Note any extra juice or sweetener you add afterward.
If the tool feels unfamiliar, practice the fill-and-pour sequence with water before making a drink. This is handling practice; it does not establish that the tool’s markings are accurately calibrated.
Record the ingredient, not just the number
“10 mL syrup” leaves an important question unanswered: which syrup? Equal volumes of different syrup recipes or commercial products need not contain equal amounts of sugar.
Record the product or the sugar-to-water ratio and whether that ratio is by weight or volume. For a 1:1 syrup by weight, for example, the starting ingredients could be 100 g sugar and 100 g water. That does not mean the finished syrup measures 200 mL.
The same habit helps with tequila and orange liqueur: write down the bottle and expression. For citrus, note whether the juice was fresh, bottled, strained, or used with pulp. Keeping the quantities steady cannot make different ingredients identical.
Scale the whole recipe
A ratio describes proportions; it does not choose a serving size. In a 2:1:1 volume ratio, setting one part to 20 mL gives 40 mL, 20 mL, and 20 mL. Setting one part to 30 mL gives 60 mL, 30 mL, and 30 mL. Neither calculation establishes a universally ideal flavor.
For multiple servings, multiply every measured ingredient, including any syrup or deliberately added water. Treat ice and preparation separately: multiplying the liquid amounts does not establish how much water the ice will add, or whether the batch will fit your shaker. Splitting a batch into recipe-sized portions for shaking is a straightforward way to keep the preparation manageable.
Keep a small note for the next round
Use a simple record: recipe, bottles, juice preparation, syrup recipe, amounts and units, measuring tool, ice and shaking method, and any adjustment. Change one ingredient amount at a time when exploring your preference, while keeping the rest as steady as practical.
Try the routine with our Cadillac margarita recipe, and save the amounts you actually used. Good measurement gives you a clearer starting point for the next margarita and a better way to remember the version you enjoyed.